
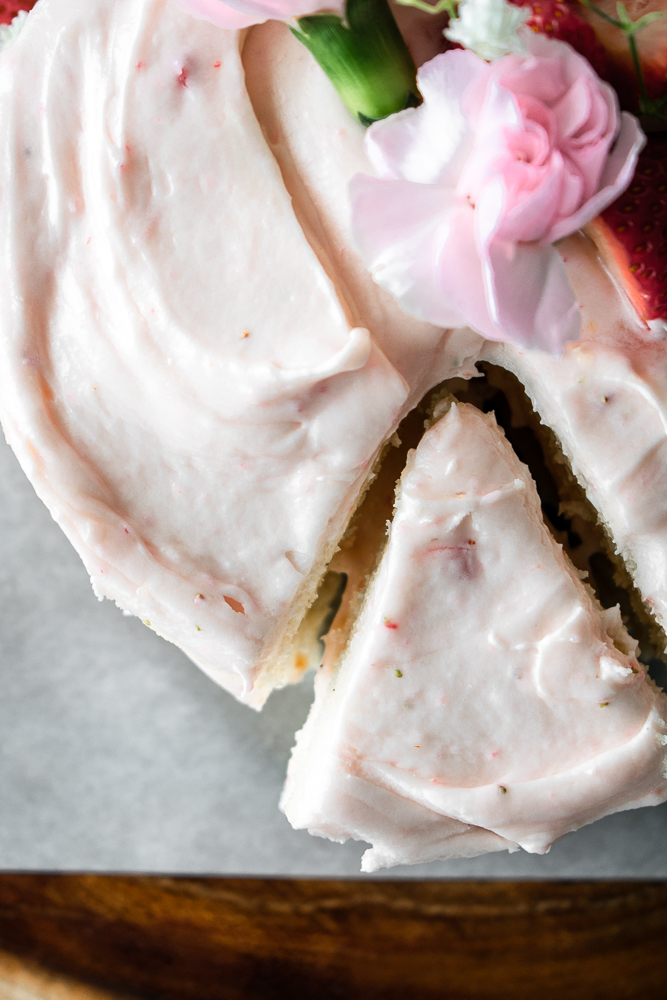
This 6-inch vanilla bean layer cake with fresh strawberry cream cheese frosting is the perfect Valentine’s Day dessert for two! Or, make this reasonably sized cake if you are looking for something sweet without all of the tempting leftovers. This cake uses Rodelle’s Vanilla Bean Paste for a more bold vanilla flavor that is extra delicious!
Valentine’s Day is not very far away which means bring on the sweets! I recently found the idea for a 6-inch layer cake on Sally’s Baking Addiction. It really does make the perfect sized dessert – not too big, not too small! If you’re looking for a fun Valentine’s Day dessert idea, read on for my tips on how to make this flavor packed vanilla bean layer cake. I’ve also included baking instructions for those of you who live at high altitude. Trust me, the adjustments make all of the difference when it comes to cake!

Thanks to my sponsor, Rodelle, for supplying the free product to help me write this post today! Rodelle is a Colorado based company that focuses on high quality baking products, baking extracts and gourmet spices. This post contains affiliate links. This means I may earn a commission should you choose to make a purchase using my link. It’s okay – I love and use all of these products, and you will too!
How to Make Vanilla Bean Layer Cake
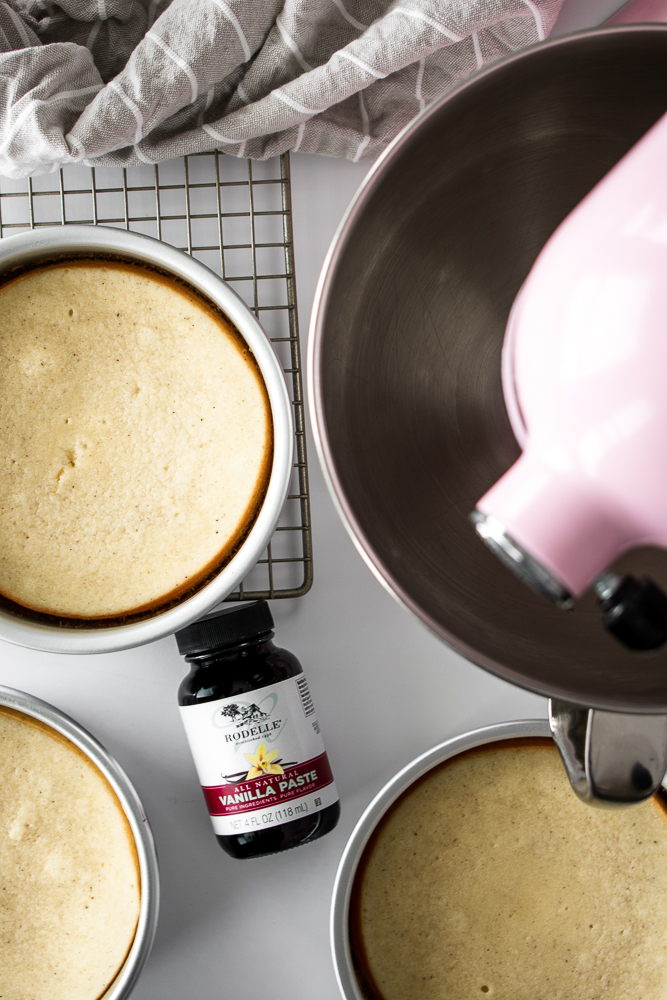
The secret to getting a bold vanilla bean flavor is using this vanilla bean paste from Rodelle. I always used to avoid baking with vanilla beans because I just didn’t like scraping out individual pods, and I didn’t really know how to use them! But this paste is so easy to bake/cook with, and it can be used in place of any normal vanilla extract (just a one to one replacement – no math to do here!). It gives baked goods a nice touch of extra delicious vanilla flavor plus, it’s so pretty to see the vanilla bean specs throughout the final product!

For this cake, you are going to need three 6×2 inch round cake pans along with a few other items and ingredients! Below, I’ve listed what I used for baking this cake and making the frosting along with a few other tools that I found helpful!

- Three 6×2 inch cake pans – I used these ones from Wilton.
- Rodelle Vanilla Bean Paste
- Various sized angled frosting spatulas
- Cuisinart Mini Food Processor – I received this as a wedding gift and use it more often than I thought I would! It’s perfect for chopping chocolate, nuts or even pureeing food. I used this to puree the strawberries for the frosting.
- Parchment Paper – you will need to cut rounds out of sheets of parchment paper to line the bottoms of the cake pans. This helps the cakes come out easily without falling apart!
- Pam Nonstick Baking Spray – This is the the best to use for any kind of cake! I never have issues getting cakes out of the pan when I use this spray.
I find these instructions really helpful for greasing and lining my cake pans! Sally explains step by step how she preps her cake pans (with pictures too!).

Making the Strawberry Cream Cheese Frosting
For the frosting, we will be using fresh, pureed strawberries! This gives the frosting a nice, light pink color with flecks of strawberries scattered throughout. I didn’t use any food coloring in this recipe – just the natural color from the strawberries! I made this frosting with cream cheese, which really adds a nice, luscious touch to this fresh strawberry frosting!


Alright, onto the high altitude baking instructions! If you live below 3.000 feet, feel free to skip ahead to the recipe 🙂
High Altitude Baking Instructions
If you live anywhere above 3.000 feet, read on! I used to have THE WORST luck with cakes. They always ended up over baked on the edges and under baked in the center. Plus, the middle would always sink in after removing the cake from the oven. Every. Single. Time. It’s always super frustrating, and cake baking should not be frustrating!
I’ve been experimenting with high altitude adjustments for awhile and will eventually be writing a detailed guide on the topic. But, for now I have included high altitude adjustments for this recipe in the instructions below! You can also locate these adjustments in the “Notes” section of the actual recipe.
How to Bake Vanilla Bean Layer Cake at High Altitude
For reference, I live at about 5,800 feet above sea level. These instructions are specifically for baking cakes at/or around this altitude (5,000 – 7,000 feet).
- Bake at 365°F – Baking temperature is one adjustment that can be made at high altitude. Things tend to dry out more quickly at higher elevations, so adjusting the temperature by 15 – 25°F ensures that your cake will not over expand and dry out too quickly. If you want to experiment, just make sure to only do small adjustments at the beginning until you find the right temperature that works for you!
- Decrease baking time to 16 – 19 minutes – Since we are cooking at a higher temperature, we’ll want to decrease the baking time so that the cake doesn’t burn.
- Decrease baking powder to 3/8 tsp. – Leavening agents proceed more quickly at higher altitudes, causing your baked goods to over expand and collapse before fully setting. THE WORST.
- Decrease baking soda to 1/8 tsp. – Same reason for decreasing baking powder.
- Decrease sugar by 1 tbsp. – For high altitude, you will need to decrease sugar by 1 tablespoon for every cup used. Increased evaporation can also increase the concentration of the sugars which can weaken the structure of the baked good.
- Add 1 additional egg white – Depending on the recipe, you can use an extra egg for added liquid and structure. This helps with slowing evaporation rates. I like doing this in cakes and breads!
- Use normal, unbleached flour instead of cake flour – This recipe calls for cake flour, which has less protein in it to make it softer and fluffier. Normally, this would be perfect for a cake! But at higher altitudes a sturdier flour, such as normal all purpose flour, is better because it helps to keep the structure of your baked goods intact due to the higher protein content in the flour itself.
Questions?
If you have additional questions about high altitude baking or anything else related to baking this layer cake, feel free to leave me a comment below or contact me! Otherwise, be on the lookout for a high altitude baking guide coming soon.
I hope that you enjoy making this cute little 6-inch cake for Valentine’s Day, whether it is for two, for your family or just for yourself! I don’t judge 🙂


Vanilla Bean Layer Cake with Strawberry Cream Cheese Frosting
Ingredients
For the Vanilla Bean Layer Cake
- 1 3/4 cup all purpose flour (you can also use cake flour if you wish)
- 3/4 tsp baking powder
- 1/4 tsp baking soda
- 1/4 tsp salt
- 1/2 cup unsalted butter (softened to room temperature)
- 1 cup granulated sugar
- 3 large egg whites (room temperature)
- 3 tsp Rodelle vanilla bean paste (link to product below)
- 1/2 cup sour cream (full fat, room temperature)
- 1/2 cup milk (I used whole milk, room temperature)
For the Fresh Strawberry Cream Cheese Frosting
- 8 oz cream cheese (full fat, room temperature)
- 1/2 cup unsalted butter (room temperature)
- 3-4 cups powdered sugar
- 1/4 cup pureed, fresh strawberries (I used about 15 medium sized strawberries)
Instructions
For the Vanilla Bean Layer Cake
- Preheat the oven to 350°F. Grease three 6×2 inch cake pans and line with parchment paper rounds. To make parchment paper rounds, trace the bottom of one of the cake pans on a piece of parchment paper and then cut out the circle. Place at the bottom of the cake pan. Grease the top of the parchment paper using cooking spray and set aside.
- Whisk the flour, baking powder, baking soda and salt together in a medium bowl. Set aside.
- Using a handheld mixer or a stand mixer fitted with the paddle attachment, cream the butter for about 1 minute on high until light and fluffy.
- Add the sugar and beat on high for 2 minutes until the butter and sugar are well incorporated and creamy. Scrape down the sides of the bowl with a spatula as needed.
- Add the egg whites and vanilla extract. Beat on medium high until well combined and then beat in the sour cream on medium high.
- Slow the speed of the mixer to low speed. With the mixer still running, slowly pour in the dry ingredients and mix until just combined. Continue to run the mixer on low and slowly pour in the milk. Mix until just combined. If you need to, turn the mixer off and finish mixing the ingredients by hand to ensure they are well combined. Do not over mix.
- Pour the batter evenly into the cake pans. Bake for 18-20 minutes, or until the cakes are baked through. The cakes are done when a toothpick inserted into the center of the cake comes out clean.
- Remove cakes from oven and allow to cool on a wire rack in the pans completely before frosting.
- If you live at high altitude (above 3,000 feet), please follow the instructions in the "Notes" section below!
To Make the Fresh Strawberry Cream Cheese Frosting
- Clean the strawberries and cut them in half. Place your strawberries into a food processor or blender and blend for a few seconds. Continue to pulse the strawberries until a puree is formed. It's ok if there are a few chunks left! You will still want to see some of the strawberry bits through the frosting. I used around 15 medium strawberries to get 1/4 cup of puree.
- Using a hand mixer or in the bowl of a stand mixer fitted with the whisk attachment, beat the cream cheese and butter on high for about 2 minutes, or until light and fluffy.
- Mix in 2 cups of the powdered sugar, one at a time. Add the strawberry puree and mix until well combined.
- Continue to add cups of powdered sugar, one at a time until desired consistency is reached. I like for the frosting to be a bit thicker for layer cakes so I used 4 cups of powdered sugar!
- Spread the frosting onto your cooled cakes with an offset frosting spatula (linked below).
- Store cake covered in the refrigerator for up to 7 days!
Notes
- Baking Temp – 365°F
- Baking Time – 16 – 19 minutes
- Use normal, unbleached all purpose flour instead of cake flour
- Use 3/8 tsp. baking powder
- Use 1/8 tsp. baking soda
- Decrease sugar by 1 tbsp.
- Use 4 egg whites
